
LEDSMART+ ™ Dimmers
Installation and setup functions
Installation and setup functions
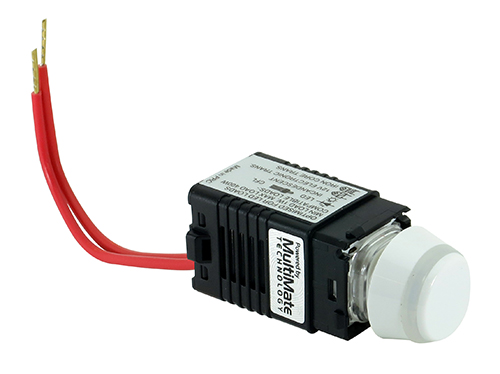
LEDSMART+ ROTARY DIMMER
Before starting to setup the dimmer, the rotary dial should be removed by pulling it off the shaft. This allows the white LED indicator to be easily seen during setup.
If the dimmer has been powered up for LESS THAN 15 MINUTES see A1 below.
If the dimmer has been powered up for MORE THAN 15 MINUTES see A2 below.
Once in Setup Mode, options are selected by a series of ‘clicks’ of the dimmer rotary shaft. Each ‘click’ should be within 1 second of the previous click.
Step 1
Press and hold the dimmer rotary shaft for 10 seconds
Note: Connected lights will dim up or down, this is normal
Step 2
The white LED Indicators will blink ON/OFF twice per second. This indicates that the dimmer is now in Setup Mode
Note: If more than one LEDsmart+ device is connected in parallel (see pages 5-7), all these devices will now enter setup mode. The blink ON/OFF will also be see on all other LEDsmart+ devices connected in parallel
In the unlikely event that other LEDsmart+ devices connected in parallel do not enter setup, exit and try again.
Step 3
The dimmer is ready for the settings to be adjusted as required. Go to the relevant setup function instructions
Step 1
Press and hold the dimmer rotary shaft for 30 seconds
Note: This resets the Setup Entry time back to 10 seconds (for the next 30 minutes)
Note: Connected lights will dim up or down, this is normal
Step 2
The white LED Indicators will blink ON/OFF twice per second. This indicates that the dimmer is now in Setup Mode
Note: If more than one LEDsmart+ device is connected in parallel (see pages 5-7), all these devices will now enter setup mode. The blink ON/OFF will also be see on all other LEDsmart+ devices connected in parallel
In the unlikely event that other LEDsmart+ devices connected in parallel do not enter setup, exit and try again.
Step 3
The dimmer is ready for the settings to be adjusted as required. Go to the relevant setup function instructions
The minimum brightness level provided by the dimmer can be set to suit specific lamps and/or customer requirements.
For the majority of lamps a minimum level as low as 0% can be set if required. However, some lamps can become unstable at low dimming levels, in particular CFL’s.
If lamps become unstable at low dimming levels, they typically flicker or pulse on/off. The dimmer allows the minimum brightness to be set to a level above the point at which the lamp flickers/pulses.
Step 1
Enter into the dimmer Setup Mode – See PART A
Step 2
Click the dimmer rotary shaft twice
Step 3
LED will blink 2 times
Note: To cancel/exit do nothing for 30 seconds
Note: If more than one dimmer is connected to the same load (see pages 5-7), all dimmers connected to this load will now blink 2 times
Step 4
Adjust dial to required MINIMUM brightness level
Note: If more than one dimmer is connected in parallel (see pages 5-7), wait for 3 seconds for the other connected dimmer to learn the new minimum level
Note: To cancel/exit do nothing for 30 seconds
Step 5
Click once to save & exit
Note: If more than one LEDsmart+ device is connected in parallel, the minimum brightness levels only needs to be set in one device. The setting is automatically saved to all other devices connected in parallel
In the unlikely event that other LEDsmart+ devices connected in parallel do not enter setup, exit and try again.
The maximum brightness level provided by the dimmer can be set to suit customer requirements.
Note that when lamps are dimmed near to full brightness, it is difficult to see changes in dimming level. Therefore, when setting up maximum brightness, it is recommended that the lamp is slowly dimmed up to a point where no further changes in brightness can be seen, and the maximum level set at this point.
Step 1
Enter into the dimmer Setup Mode – See PART A
Step 2
Click the dimmer rotary shaft three times
Step 3
LED will blink 3 times
Note: To cancel/exit do nothing for 30 seconds
Note: If more than one dimmer is connected to the same load, all dimmers connected to this load will now blink 3 times
Step 4
Adjust dial to required maximum brightness level
Note: To cancel/exit do nothing for 30 seconds
Step 5
Click once to save & exit
In the unlikely event that other LEDsmart+ devices connected in parallel do not enter setup, exit and try again.
The ‘kick-start’ feature is only required to be enabled when dimming loads such as compact fluorescent lamps. These lamps require the dimmer output to be set to 50% for 0.2 of a second when the lamp is turned on. This ensures the lamp strikes successfully. The result is a short bright ‘blink’ when a compact florescent lamp turns on.
As the bright blink caused by the kick start feature can be undesirable for the user, it is highly recommended that this feature remains disabled (the default) when using LED’s and other light sources which do not require the kick-start to operate.
By default Kick Start Mode is disabled. To enable Kick Start Mode, follow the steps below.
Step 1
Enter into the dimmer Setup Mode – See PART A
Step 2
Click the dimmer rotary shaft four times
Step 3
LED will blink 4 times
If Kick start is currently Disabled, lamp(s) connected to the dimmer will now turn OFF
If Kick start is currently Enabled, lamp(s) connected to the dimmer will now turn ON
Note: To cancel/exit do nothing for 30 seconds
Note: If more than one dimmer is connected to the same load, all dimmers connected to this load will now blink 4 times
Step 4
To Enable Kick Start Mode
Adjust the dial Clockwise until lamp(s) turn ON
To Disable Kick Start Mode (Default)
Adjust dial Anti-Clockwise until lamp(s) turn OFF
Note: To cancel/exit do nothing for 30 seconds
Step 5
Click once to save & exit
In the unlikely event that other LEDsmart+ devices connected in parallel do not enter setup, exit and try again.
When the dimmer is switched off, the white LED indicators in the dimmer can be set to glow on or turn off.
By Default, the white LED indicators are set to glow on when the dimmer is turned off.
To set the LED indicators to turn off when the dimmer is off, follow the steps below.
Step 1
Enter into the dimmer Setup Mode – See PART A
Step 2
Click the dimmer rotary shaft five times
Step 3
LED will blink 5 times
Note: To cancel/exit do nothing for 30 seconds
Step 4
To set Indicator to glow on when dimmer is off
Adjust the dial Clockwise until the lamp(s) turns ON
To set Indicator to turn off when dimmer is off
Adjust the dial Anti-Clockwise until the lamp(s) turns OFF
Note: To cancel/exit do nothing for 30 seconds
Step 5
Click once to save & exit
The dimmer is designed to operate as a combined switch and dimmer, taking up only one gang in a wall plate.
However, some lamps (for example, non-dimmable CFL’s) can flicker when switched OFF by pressing the rotary dial. In these cases it is recommended that the dimmer is used in ‘Separate Switch Mode’ and combined with a standard mechanical switch. Note this also applies where two way switching operation is required.
When used in the Separate Switch Mode, the dimmer turn-on level needs to be set. This is covered in Step 4 below.
Step 1
Enter into the dimmer Setup Mode – See PART A
Step 2
Click the dimmer rotary shaft six times
Step 3
LED will blink 6 times
Note: To cancel/exit do nothing for 30 seconds
Step 4
To Enable Separate Switch Mode
Adjust the dial Clockwise until the lamp(s) turn ON
Note the level the lamp(s) are adjusted to during this step will be the turn on level when the separate switch is used during normal operation
To Disable Separate Switch Mode
Adjust the dial Anti-clockwise until the lamp(s) turn OFF (or pulses ON/OFF)
Note: To cancel/exit do nothing for 30 seconds
Step 5
Click once to save & exit
Note for Separate Switch Mode
– Clicking the rotary dial will toggle between the minimum level and the previous level
– ‘Wake up’ mode cannot be used
– LED indicators are always off when the separate switch is off
– The dimmer does not recall the previously set dimming level when switched back on. It turns back on to level set in step 4 above.
Step 1
Enter into the dimmer Setup Mode – See PART A
Step 2
Click the push button 7 times
Step 3
LED will blink 7 times
a. If the memory dimmer function is currently Disabled, lamp(s) connected to the dimmer will now turn OFF
b. If the memory dimmer function is currently Enabled, lamps(s) connected to the dimmer will now turn ON
Note: To cancel/exit do nothing for 30 seconds
Note: If more than one dimmer is connected to the same load, all dimmers connected to this load will now blink 7 times
Step 4
To Enable the memory dimmer adjust the dial Clockwise until the lamp(s) turns ON
To Disable the memory dimmer (Default) adjust the dial Anti-clockwise until the lamp(s) turns OFF
Note: To cancel/exit do nothing for 30 seconds
Step 5
Click once to save & exit
In the unlikely event that other LEDsmart+ devices connected in parallel do not enter setup, exit and try again.
Step 1
Enter into the dimmer Setup Mode – See PART A
Step 2
Click the push button 8 times
Step 3
LED will blink 8 times
a. If the MultiMate™ function is currently Disabled, lamp(s) connected to the dimmer will now turn OFF
b. If the MultiMate™ function is currently Enabled, lamps(s) connected to the dimmer will now turn ON
Note: To cancel/exit do nothing for 30 seconds
Step 4
To Enable MultiMate™ (Default) adjust the dial Clockwise or push-and-hold the button until the lamp(s) turns ON
To Disable MultiMate™ adjust the dial Anti-clockwise or push-and-hold the button until the lamp(s) turns OFF
Note: To cancel/exit do nothing for 30 seconds
Step 5
Click once to save & exit
Step 1
Enter into the dimmer Setup Mode – See PART A
Step 2
Click the dimmer rotary shaft ten times
Step 3
The dimmer will automatically exit Setup Mode once reset
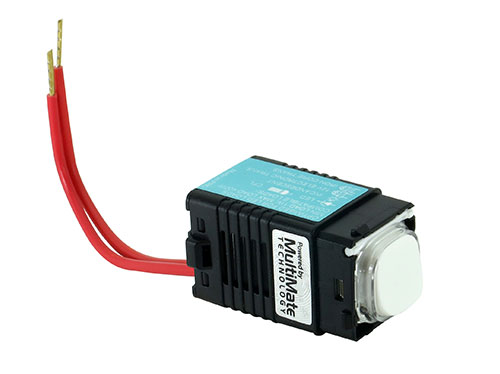
LEDSMART+ PUSH BUTTON DIMMER
If the dimmer has been powered up for LESS THAN 15 MINUTES see A1 below.
If the dimmer has been powered up for MORE THAN 15 MINUTES see A2 below.
Once in Setup Mode, options are selected by a series of ‘clicks’ of the dimmer push button. Each ‘click’ should be within 1 second of the previous click.
Step 1
Press and hold the dimmer push button for 10 seconds
Note: Connected lights will dim up or down, this is normal
Step 2
The white LED Indicators will blink ON/OFF twice per second. This indicates that the dimmer is now in Setup Mode
Note: If more than one LEDsmart+ device is connected in parallel (see pages 5-7), all these devices will now enter setup mode. The blink ON/OFF will also be see on all other LEDsmart+ devices connected in parallel
In the unlikely event that other LEDsmart+ devices connected in parallel do not enter setup, exit and try again.
Step 3
The dimmer is ready for the settings to be adjusted as required. Go to the relevant setup function instructions
Step 1
Press and hold the dimmer push button for 30 seconds
Note: This resets the Setup Entry time back to 10 seconds (for the next 30 minutes)
Note: Connected lights will dim up or down, this is normal
Step 2
The white LED Indicators will blink ON/OFF twice per second. This indicates that the dimmer is now in Setup Mode
Note: If more than one LEDsmart+ device is connected in parallel (see pages 5-7), all these devices will now enter setup mode. The blink ON/OFF will also be see on all other LEDsmart+ devices connected in parallel
In the unlikely event that other LEDsmart+ devices connected in parallel do not enter setup, exit and try again.
Step 3
The dimmer is ready for the settings to be adjusted as required. Go to the relevant setup function instructions
The minimum brightness level provided by the dimmer can be set to suit specific lamps and/or customer requirements.
For the majority of lamps a minimum level as low as 0% can be set if required. However, some lamps can become unstable at low dimming levels, in particular CFL’s.
If lamps become unstable at low dimming levels, they typically flicker or pulse on/off. The dimmer allows the minimum brightness to be set to a level above the point at which the lamp flickers/pulses.
Step 1
Enter into the dimmer Setup Mode – See PART A
Step 2
Click the dimmer push button twice
Step 3
LED will blink 2 times
Note: To cancel/exit do nothing for 30 seconds
Note: If more than one dimmer is connected to the same load, all dimmers connected to this load will now blink 2 times
Step 4
Push and hold the button to adjust the required MINIMUM brightness level
Note: If more than one dimmer is connected in parallel, wait for 3 seconds for the other connected dimmer to learn the new minimum level
Note: To cancel/exit do nothing for 30 seconds
Step 5
Click once to save & exit
Note: If more than one LEDsmart+ device is connected in parallel, the minimum brightness levels only needs to be set in one device. The setting is automatically saved to all other devices connected in parallel
In the unlikely event that other LEDsmart+ devices connected in parallel do not enter setup, exit and try again.
The maximum brightness level provided by the dimmer can be set to suit customer requirements.
Note that when lamps are dimmed near to full brightness, it is difficult to see changes in dimming level. Therefore, when setting up maximum brightness, it is recommended that the lamp is slowly dimmed up to a point where no further changes in brightness can be seen, and the maximum level set at this point.
Step 1
Enter into the dimmer Setup Mode – See PART A
Step 2
Click the push button 3 times
Step 3
LED will blink 3 times
Note: To cancel/exit do nothing for 30 seconds
Note: If more than one dimmer is connected to the same load, all dimmers connected to this load will now blink 3 times
Step 4
Push and hold the button adjust to required maximum brightness level
Note: To cancel/exit do nothing for 30 seconds
Step 5
Click once to save & exit
In the unlikely event that other LEDsmart+ devices connected in parallel do not enter setup, exit and try again.
The ‘kick-start’ feature is only required to be enabled when dimming loads such as compact fluorescent lamps. These lamps require the dimmer output to be set to 50% for 0.2 of a second when the lamp is turned on. This ensures the lamp strikes successfully. The result is a short bright ‘blink’ when a compact florescent lamp turns on.
As the bright blink caused by the kick start feature can be undesirable for the user, it is highly recommended that this feature remains disabled (the default) when using LED’s and other light sources which do not require the kick-start to operate.
By default Kick Start Mode is disabled. To enable Kick Start Mode, follow the steps below.
Step 1
Enter into the dimmer Setup Mode – See PART A
Step 2
Click the push button 4 times
Step 3
LED will blink 4 times
If Kick start is currently Disabled, lamp(s) connected to the dimmer will now turn OFF
If Kick start is currently Enabled, lamp(s) connected to the dimmer will now turn ON
Note: To cancel/exit do nothing for 30 seconds
Note: If more than one dimmer is connected to the same load, all dimmers connected to this load will now blink 4 times
Step 4
To Enable Kick Start Mode
Push and hold the button to adjust the level until the lamp(s) turn ON
To Disable Kick Start Mode (Default)
Push and hold the button to adjust the level until the lamp(s) turn OFF
Note: To cancel/exit do nothing for 30 seconds
Step 5
Click once to save & exit
In the unlikely event that other LEDsmart+ devices connected in parallel do not enter setup, exit and try again.
When the dimmer is switched off, the white LED indicators in the dimmer can be set to glow on or turn off.
By default, the white LED indicators are set to glow on when the dimmer is turned off. This can be useful as a nightlight.
To set the LED indicators to turn off when the dimmer is off, follow the steps below.
Step 1
Enter into the dimmer Setup Mode – See PART A
Step 2
Click the push button 5 times
Step 3
LED will blink 5 times
Note: To cancel/exit do nothing for 30 seconds
Step 4
To set Indicator to glow on when dimmer is off (default)
Push and hold the button to adjust the level until the lamp(s) turn ON
To set Indicator to turn off when dimmer is off
Push and hold the button to adjust the level until the lamp(s) turn OFF
Note: To cancel/exit do nothing for 30 seconds
Step 5
Click once to save & exit
The dimmer is designed to operate as a combined switch and dimmer, taking up only one gang in a wall plate.
However, some lamps (for example, non-dimmable CFL’s) can flicker when switched OFF by pressing the dimmer’s push button.
In these cases it is recommended that the dimmer is used in ‘Separate Switch Mode’ and combined with a standard mechanical switch. Note this also applies where two way switching operation is required.
When used in the Separate Switch Mode, the dimmer turn-on level needs to be set. This is covered in step 4 below.
Step 1
Enter into the dimmer Setup Mode – See PART A
Step 2
Click the push button 6 times
Step 3
Click the push button 6 times
Note: To cancel/exit do nothing for 30 seconds
Step 4
To Enable Separate Switch Mode
Push and hold the button to adjust the level until the lamp(s) turn ON
Note the level the lamp(s) are adjusted to during this step will be the turn on level when the separate switch is used during normal operation
To Disable Separate Switch Mode
Push and hold the button to adjust the level until the lamp(s) turn OFF (or pulses ON/OFF)
Note: To cancel/exit do nothing for 30 seconds
Step 5
Click once to save & exit
Note for Separate Switch Mode
– Clicking the push button will toggle between min and max level if the memory dimmer is disabled
– Clicking the push button will toggle between min level and previous level if the memory dimmer is enabled
– ‘Wake up’ mode cannot be used
– LED indicators are off when the separate switch is off
– When the separate switch is turned on, the lamps will always go to the level set in step 4 above
The dimmer has the option to turn on at the brightness level set when the lights were turned off (memory dimmer), or to turn on at the maximum brightness level.
By default, the memory dimmer option is disabled. Then, by default, when the connected lights are off and the button is tapped, the lights will switch on at maximum brightness. However, pushing and holding the button when the connected lights are off will dim the lights up from the minimum level.
To enable or disable the memory dimmer function, follow the steps below.
Step 1
Enter into the dimmer Setup Mode – See PART A
Step 2
Click the push button 7 times
Step 3
LED will blink 7 times
If the memory dimmer function is currently Disabled, lamp(s) connected to the dimmer will now turn OFF
If the memory dimmer function is currently Enabled, lamps(s) connected to the dimmer will now turn ON
Note: To cancel/exit do nothing for 30 seconds
Note: If more than one dimmer is connected to the same load, all dimmers connected to this load will now blink 7 times
Step 4
To Enable the memory dimmer
Push and hold the button to adjust the level until the lamp(s) turn ON
To Disable the memory dimmer (Default)
Push and hold the button to adjust the level until the lamp(s) turn OFF
Note: To cancel/exit do nothing for 30 seconds.
Step 5
Click once to save & exit
In the unlikely event that other LEDsmart+ devices connected in parallel do not enter setup, exit and try again.
Step 1
Enter into the dimmer Setup Mode – See PART A
Step 2
Click the push button 8 times
Step 3
LED will blink 8 times
a. If the MultiMate™ function is currently Disabled, lamp(s) connected to the dimmer will now turn OFF
b. If the MultiMate™ function is currently Enabled, lamps(s) connected to the dimmer will now turn ON
Note: To cancel/exit do nothing for 30 seconds
Step 4
To Enable MultiMate™ (Default) push-and-hold the button until the lamp(s) turns ON
To Disable MultiMate™ a push-and-hold the button until the lamp(s) turns OFF
Note: To cancel/exit do nothing for 30 seconds
Step 5
Click once to save & exit
Step 1
Enter into the dimmer Setup Mode – See PART A
Step 2
Click the push button ten times
Step 3
The dimmer will automatically exit Setup Mode once reset